Unexpected from Lily

Posted on January 2, 2016

In one of life’s twists, we found out this week that Lily needs surgery to remove a cancerous lump from her face.  We’d noticed it growing over her eyebrow this summer and lamented that our little 6-year-old puppy was old enough to grow fatty lumps.  All dogs get fatty lumps, don’t they? And she’d already grown one on her chest that the vet said was probably nothing.

Then we noticed another lump growing in her teats, and we figured it was time to bring her in.  She was due for a checkup anyway.  But when the vet looked at samples of all three lumps under the microscope, she said that the one on her face was mast cell cancer.  She also said that mast cell cancer has a tendency to spread to the lungs in dogs, so we should get her in for surgery as soon as possible.

Lily goes in a week from Monday to remove the cancer, which they’ll take down to the bone, and the other two lumps to play it safe.  She’ll need x-rays of her chest to determine if the cancer has spread, and they’ll send away samples of all the lumps to get more information.  All in all, this will cost a little more than $2000, which is about one-tenth of the tiny house budget.  Oh you money dog.

IMG_2722 IMG_2759

There was never a question over whether or not we’d get the surgery.  Lily is a part of our family, and a big part of our farm life.  She’s the reason why I began thinking about a farm in the first place, when I was at my sickest with migraines and sick building syndrome, and it was all I could do to walk a mile with her across the fields of Wagon Hill park.  I felt my best outside.  She did too.  And five years later, she became Seth’s farm buddy, trotting by his side in the fields, guarding against voles and bunnies, greeting guests as they drove in.

So here we are, facing surgery in the season of rest. We’ll figure out the money part, just like we’re figuring out the tiny house part and the farming part.  In the meantime we’ll love up Lily like there’s no tomorrow.  Like always, in fact.  But if you could throw a little love our way, we’d like that too.  Keep your fingers crossed that the surgery goes well, that the x-rays show a set of healthy lungs, and that the histopathologies come back with good news.  Thanks, friends.

The return of the light

Posted on December 22, 2015

Happy winter solstice! I can think of no better way to celebrate the light’s return than at a farm.  We spent our solstice morning helping out with a  friend’s grain threshing day.  This 5-acre farm grew rice, wheat, and dried beans this season, and hosted a party for those of us who wanted to try our hands at hulling, grinding, and processing the grains to make them ready for human consumption. There were old exercise bikes mounted to older milling implements, an 1851 wheat chaff separator, a fire barrel, and some tinkering and ingenuity as we kept breaking down and starting up again.

We drove to the tiny house after lunch to close it up for this week’s rain. Just before the light left for the day, we burnt some herbs and our intentions for the year 2016, and then rounded out the evening at home in our pjs eating an all local dinner.

Sometimes, friends, we just get it right.  And we’re wishing you a good winter season full of things you get right too.  Happy solstice.


Boxing it in

Posted on December 7, 2015

High-res version

December is being kind to us, starting with a couple weeks of mild weather and letting us find our feet with the plywood sheathing for the tiny house.  Find our feet because Seth’s winter schedule is different from his summer schedule, so we don’t have a build day together that often.  Once every two weeks or so?  Three?  I couldn’t say.

When we are together (and migraine-free), we hang plywood.  It took two sheets for us to get a good process down with just two of us, but now we’re a little more than halfway done with the wall sheathing thanks to some time and generosity from friends.

I spent the afternoon yesterday making a template for the plywood to go over the wheel wells, and then cutting the plywood and hanging it.  And let me tell you something: plywood is heavy!  A day later and I’m still tired.  But the house looks nice, don’t you think? We are inching ever closer to getting things boxed in so we can put the roof rafters on.

We chose to sheathe the walls of the house first so that the plywood will sit up fully under the roof rafters.  The alternative was putting up the roof rafters first and then trying to fit the plywood underneath where the rafters hit the walls.  Both methods are valid but from what I understand, the way we’re doing it is easier.  Then again, I feel a little like Anne of Green Gables when she says, “Have you ever noticed one encouraging thing about me? I never make the same mistake twice.”

And then Marilla says, “I don’t know as that’s much benefit when you’re always making new ones.”

Time will tell if we’re making a mistake.  But the good news is that once we know about it, we won’t make it twice.

Shilling hat

Posted on November 22, 2015

Shilling5 Shilling3

Shilling is a hat that knits up in worsted weight yarn.  It is available for both flat knitters and knitters in the round, and while a beginner could knit it, advanced knitters won’t find it boring with its cables and pattern changes. The hat is knit on US size 4 and 6 (UK size 3.5 and 4) needles, and is sized for babies through adults.

I knit this hat for Seth, who picked the beautiful heathery rust color from the Cascade 220 Heathers line.  However once it was done, I decided I didn’t want to part with it!  So this hat stays with me and is  a staple of my winter wardrobe.

Shilling2

Click here to download the pattern PDFClick here for the Ravelry details.

Like this design? Click here for other offerings by Earth Morning.

Please note that there is an affiliate link on this page to purchase the Cascade 220 Heathers line wool.  It costs you nothing and supports our tiny house build.  Thanks!

Wind, water, and weather

Posted on November 13, 2015

High-res version
IMG_0987

House progress has been slow going for the last month as we straightened out the beam situation. But we were both looking forward to the week’s vacation I took from work this week so we could get some serious house building done. Unfortunately, it turns out that Hurricane Kate, while not landing on the East Coast, made for for several wet, drizzly days in a row in the middle of my vacation that made it less than ideal for running power tools. And coupled with another migraine, meant that half of my vacation was down the tubes.

It’s not really a catastrophe, or even very bad.  It made for a leisurely vacation.  We put up those beams, did some planning, some planing, and other things. The frustrating part comes from the thought of our house getting soaked again. Argh!  Water.  And although it’s nice out now with these 50 degree days, winter is coming on soon.  We’re going to have to hustle to get the house closed up in time for snowfall.  Otherwise we could be looking at all kinds of water damage, like soaked plywood floors, wood that bows up and out, damaged beams.  You know.

IMG_0965IMG_0967

No worse than usual, I guess!

A home made by hand

Posted on November 10, 2015

Craigslist has been a good friend to us.  We’ve spent hours poking around the different Craigslist sites for the region.  First it was lumber, then plywood, then cabinetry, windows, and finally beams.  Sometimes it was a stroll through the Materials tab to see what was available, just in general.  And the more we see on Craigslist, the more our hearts grow with the thought of making this home, all of this home, by hand.

I don’t know what it is.  No, scratch that.  I know what it is.  It’s the feeling of accomplishment, and of being able to point to something and say, “I know exactly where that comes from.  I know how long it took to make.  I remember researching how to install it, and I remember putting in the nails.  Here’s the finish we used.”  Seth has been leading this charge, I think because of his work as a CSA farmer, which is the ultimate in showing where something came from and how it grew.  And so when it came time to put in the first wood in the house that would be visible (vs. being enclosed by walls), it was only natural that we said to each other, “Wouldn’t it be great if we used old, reclaimed wood from some historic house somewhere?”

The wood I’m talking about is for the exposed 4″ x 6″ beams that support our kitchen loft.  Craigslist showed us half a dozen entries with old, reclaimed beams.  Some were from modern houses going for a new look, some were from old, old houses being torn down, and some were somewhere in between.  We lucked out and read about a 1792 house in Rhode Island that the owner decided to deconstruct.  His listing described American Chestnut beams.

Hold the phones!  American Chestnut used to be one of the most common trees on this side of the Mississippi.  That is, before it was decimated by blight brought over with chestnut trees from Japan in the early 1900s.  There are no living stands of American Chestnut.  The wood is almost impossible to find.  Which means, of course, that we had to have it.  And so one crisp evening after a full day of farming, Seth drove a borrowed truck down to Rhode Island and loaded up seven axe-hewn beams.

It took us four weeks to schedule the beam pickup, remove the nails from the beams, attempt to saw them on our own table saw (and fail), and finally break down and hire a portable sawmill to re-saw the beams into manageable sizes in our own driveway.  When I described this process to some of my contractor friends at work, they said, “You know, 4″ x 6″ beams are really cheap at Home Depot.  You should just buy those and slap some stain on them.”

I could have responded with the long answer, but I think I shrugged and said, “Aesthetics, you know?” And they nodded.   But the long answer is this: We want to be able to say we made every bit of this home with materials we want, going for the look we want, and hang the time frame.  It’s important for us to know each part of this house, know it in the way that painters know each brush stroke and dancers know each muscle.  We’re not building just a house; we’re building our home.

Earth-friendly agriculture: Soluna Garden Farm

Posted on October 17, 2015

IMG_0953 IMG_0959

The next stop on our tour of farms that use earth-friendly growing techniques is Soluna Garden Farm in Winchester, MA.  Seth was unable to make this visit, but I met with Amy Hirschfeld, one of the farm owners, to see how they grow their products.

Clocking in at 1.5 acres, Soluna is a small farm like Stearns that doesn’t pursue organic certification, although they use organic practices.  The folks at Soluna grow herbs and flowers for CSA and farmers markets. They also custom mix numerous dried spice and tea blends, which they sell at their store in downtown Winchester, their stall in Boston Public Market, and at farmers markets across Eastern Massachusetss.

I was excited to head to Soluna because I love herbs. I’ve never been to an herb-only farm before, so I didn’t know what to expect. Soluna didn’t disappoint! The farm is tucked behind a row of private houses on a busy street in Winchester, and when you head down the driveway of an ordinary house, you’re greeted by a greenhouse, a high deer fence, and an expanse of tidy flower and herb beds beyond.

IMG_0964 IMG_0962Soluna has been in business since 2009, although the land has been worked since the 1970s when Amy’s father purchased the plot to create an organically-minded hobby farm.  After he passed away, Amy continued to grow at the farm and eventually decided to start Soluna with a CSA for herb and flower lovers.

Soluna uses a permanent bed system across the majority of their land.  This means that at the end of the season they don’t till the beds into the ground like a typical vegetable farm, but rather delineate where crops grow with permanent raised beds. This has the downside of preventing the farmers from using mechanical cultivation like tractors to suppress weeds. On the upside, the raised beds warm more quickly than fields in the spring, which means you can get plants in the ground sooner.  They also have the benefit of preserving soil structure, provided you don’t completely turn the soil over when planting.  Soil structure is important!  Soil has different strata, and each layer hosts a level of microbial and animal life, all of which make nutrients more readily available to plants.

That’s not to say Soluna doesn’t use standard measures tillage and like black plastic weed suppression.  They do!  They just use these practices judiciously, in plots where they grow annuals.  Amy told me that Soluna invested in reusable landscape fabric this year and, combined with drip tape for irrigation, this saved them a ton of weeding and gave them some very happy plants.

IMG_0957 IMG_0955While many of the herbs at Soluna are perennials, some of the plants don’t enjoy a New England winter.  Can you blame them?  This is where Soluna’s farmers strike me as particularly brilliant.  Each winter, they dig up certain whole plants like rosemary, or the root corms of other herbs and flowers, and store them in the greenhouse or cellar where they stay dormant until they’re ready to be planted again.  This isn’t something that a large farm can attempt unless they have a massive amount of storage space and a lot of hands on deck.  But for a garden farm, it seems to work.  As a bonus, the plants that grow each Spring are already used to the soil and pests at Soluna, which makes for stronger crops all around.

I wish I had a month to spend working with Amy and the plants. We talked about all sorts of neat things like using compost as an energy source (something that they’re hoping to implement this winter), and developing a line of herbal liqueurs to supply some of Boston’s bars. There was the conversation about seasonal herb salt or tea blends, and inspiring a taste for adventure in customers.  And of course, the herbs themselves, the walking and touching and smelling and tasting.  My friends, this is earth friendly agriculture at its best.  I’m thrilled to have taken a tour of Soluna Garden Farm.  Thank you again Amy!

The raising of the walls

Posted on September 21, 2015

This slideshow requires JavaScript.

With the weather on our side this weekend, we got our walls in the air.  It was the first of what I hope will be many community build days, and a big thank you to Zach, Richard, Linda, Jules, Jay, Evie, Andrew, and Alex! This crew was amazing.

Over the last several weeks, Seth and I have spent our weekends measuring and cutting wood, and then laying out walls and nailing them together.  But for the day of the wall raising, we still needed to build half of each of the long walls. And so Seth and I began this past Sunday with frantic wood cutting.  A little more than an hour in, Linda arrived and took over the measuring portion, and I began to lay out walls.

Then as everyone else arrived, we divided into two crews.  A few of us finished laying out the two wall halves on the ground, and everyone else lifted our already built walls into place. We moved along at a good clip.  It turned out to be a repetitive process: lay down sill seal; lift wall into place; adjust so that it’s level, flush with the trailer, and plumb.; nail down bottom plate; brace wall with a long 2×4; nail in corner posts; repeat. Before we broke for a late lunch, we nailed together the two half walls.  And by we, I mean Seth, Zach, and Julie, who were pretty badass with the way they handled the nail guns.

By the end of the day, everyone could still account for their eyes and fingers, and Seth and I left our skeleton of a house standing where there used to be nothing but a trailer.  I call that a success! We’ve still got a ways to go, but it’s exciting getting our walls up and showing people just how spacious a tiny house can be on the inside.  Here’s to one step further on this adventure.

Insulation and Lumber

Posted on August 16, 2015

With the trailer finally ready to go, we placed an order for wood and insulation.

“Wait!” I can hear Seth saying, “it wasn’t that easy.”  Of course it wasn’t!  Because when you’re Christine, you have to research everything about everything, all of the time.  What can I say?  It’s what I do.

For insulation, we needed 2.5″ of rigid foam to fill the space within the trailer. Rigid foam is lightweight, it cuts easily, and the kind we picked doesn’t absorb water.  This is important because we want to discourage mold growth as much as possible, thanks to my health sensitivities.

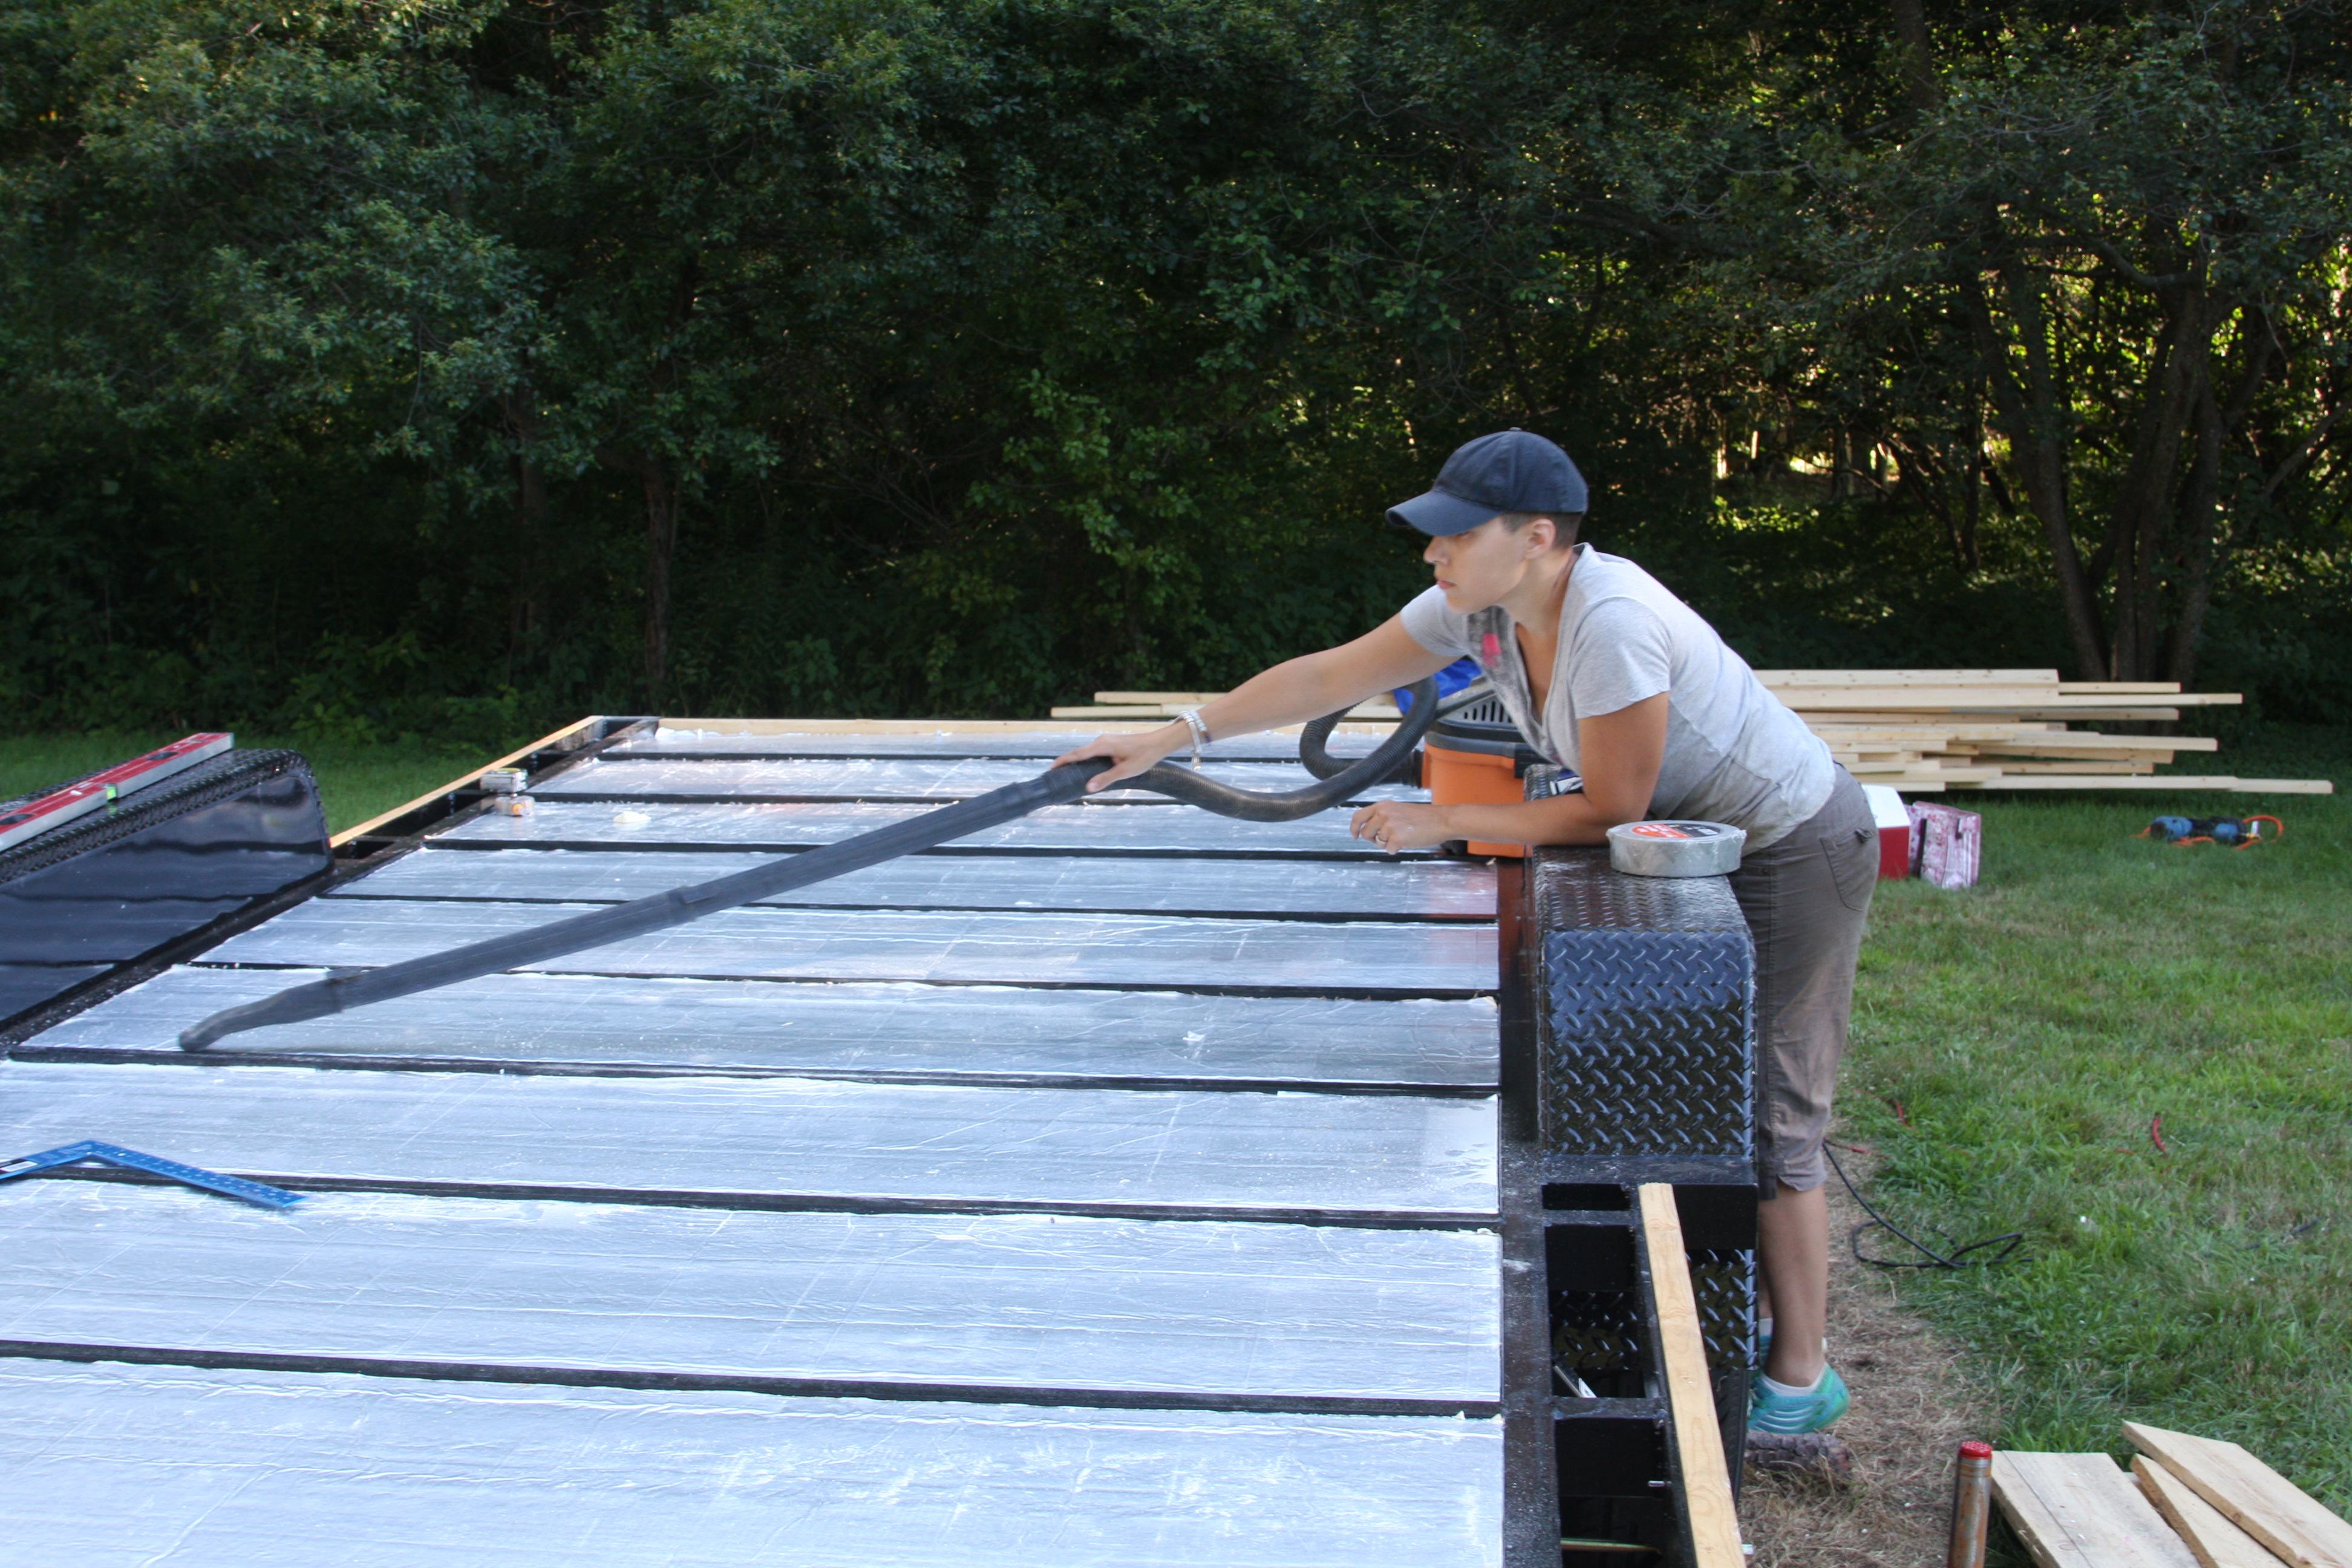
We chose to go with 1″ of xps insulation, and 1.5″ of polyiso insulation.  In the best of all possible worlds, this will give us a floor with an r-value of 16.5 in our flooring. You see, xps works better in cold weather than hot, but polyiso is the opposite.  Polyiso works worse in cold weather because the gas that’s trapped in the air spaces in the foam condenses into a liquid in 20 degree or lower temperatures, negating the r-value. The trick to using polyiso is that it has to be insulated from cold air.  We accomplished this by placing the xps into the trailer first, then laying the polyiso on top of that.

The polyiso has reflective foil on both sides.  First, if you leave a small gap between in the insulation and subfloor, the foil will reflect heat from above back into the subfloor, and second, it will reflect cold from below back down toward the xps.  Hopefully, this will be enough to keep our r-value up and prevent cold feet in the winter.

IMG_0888
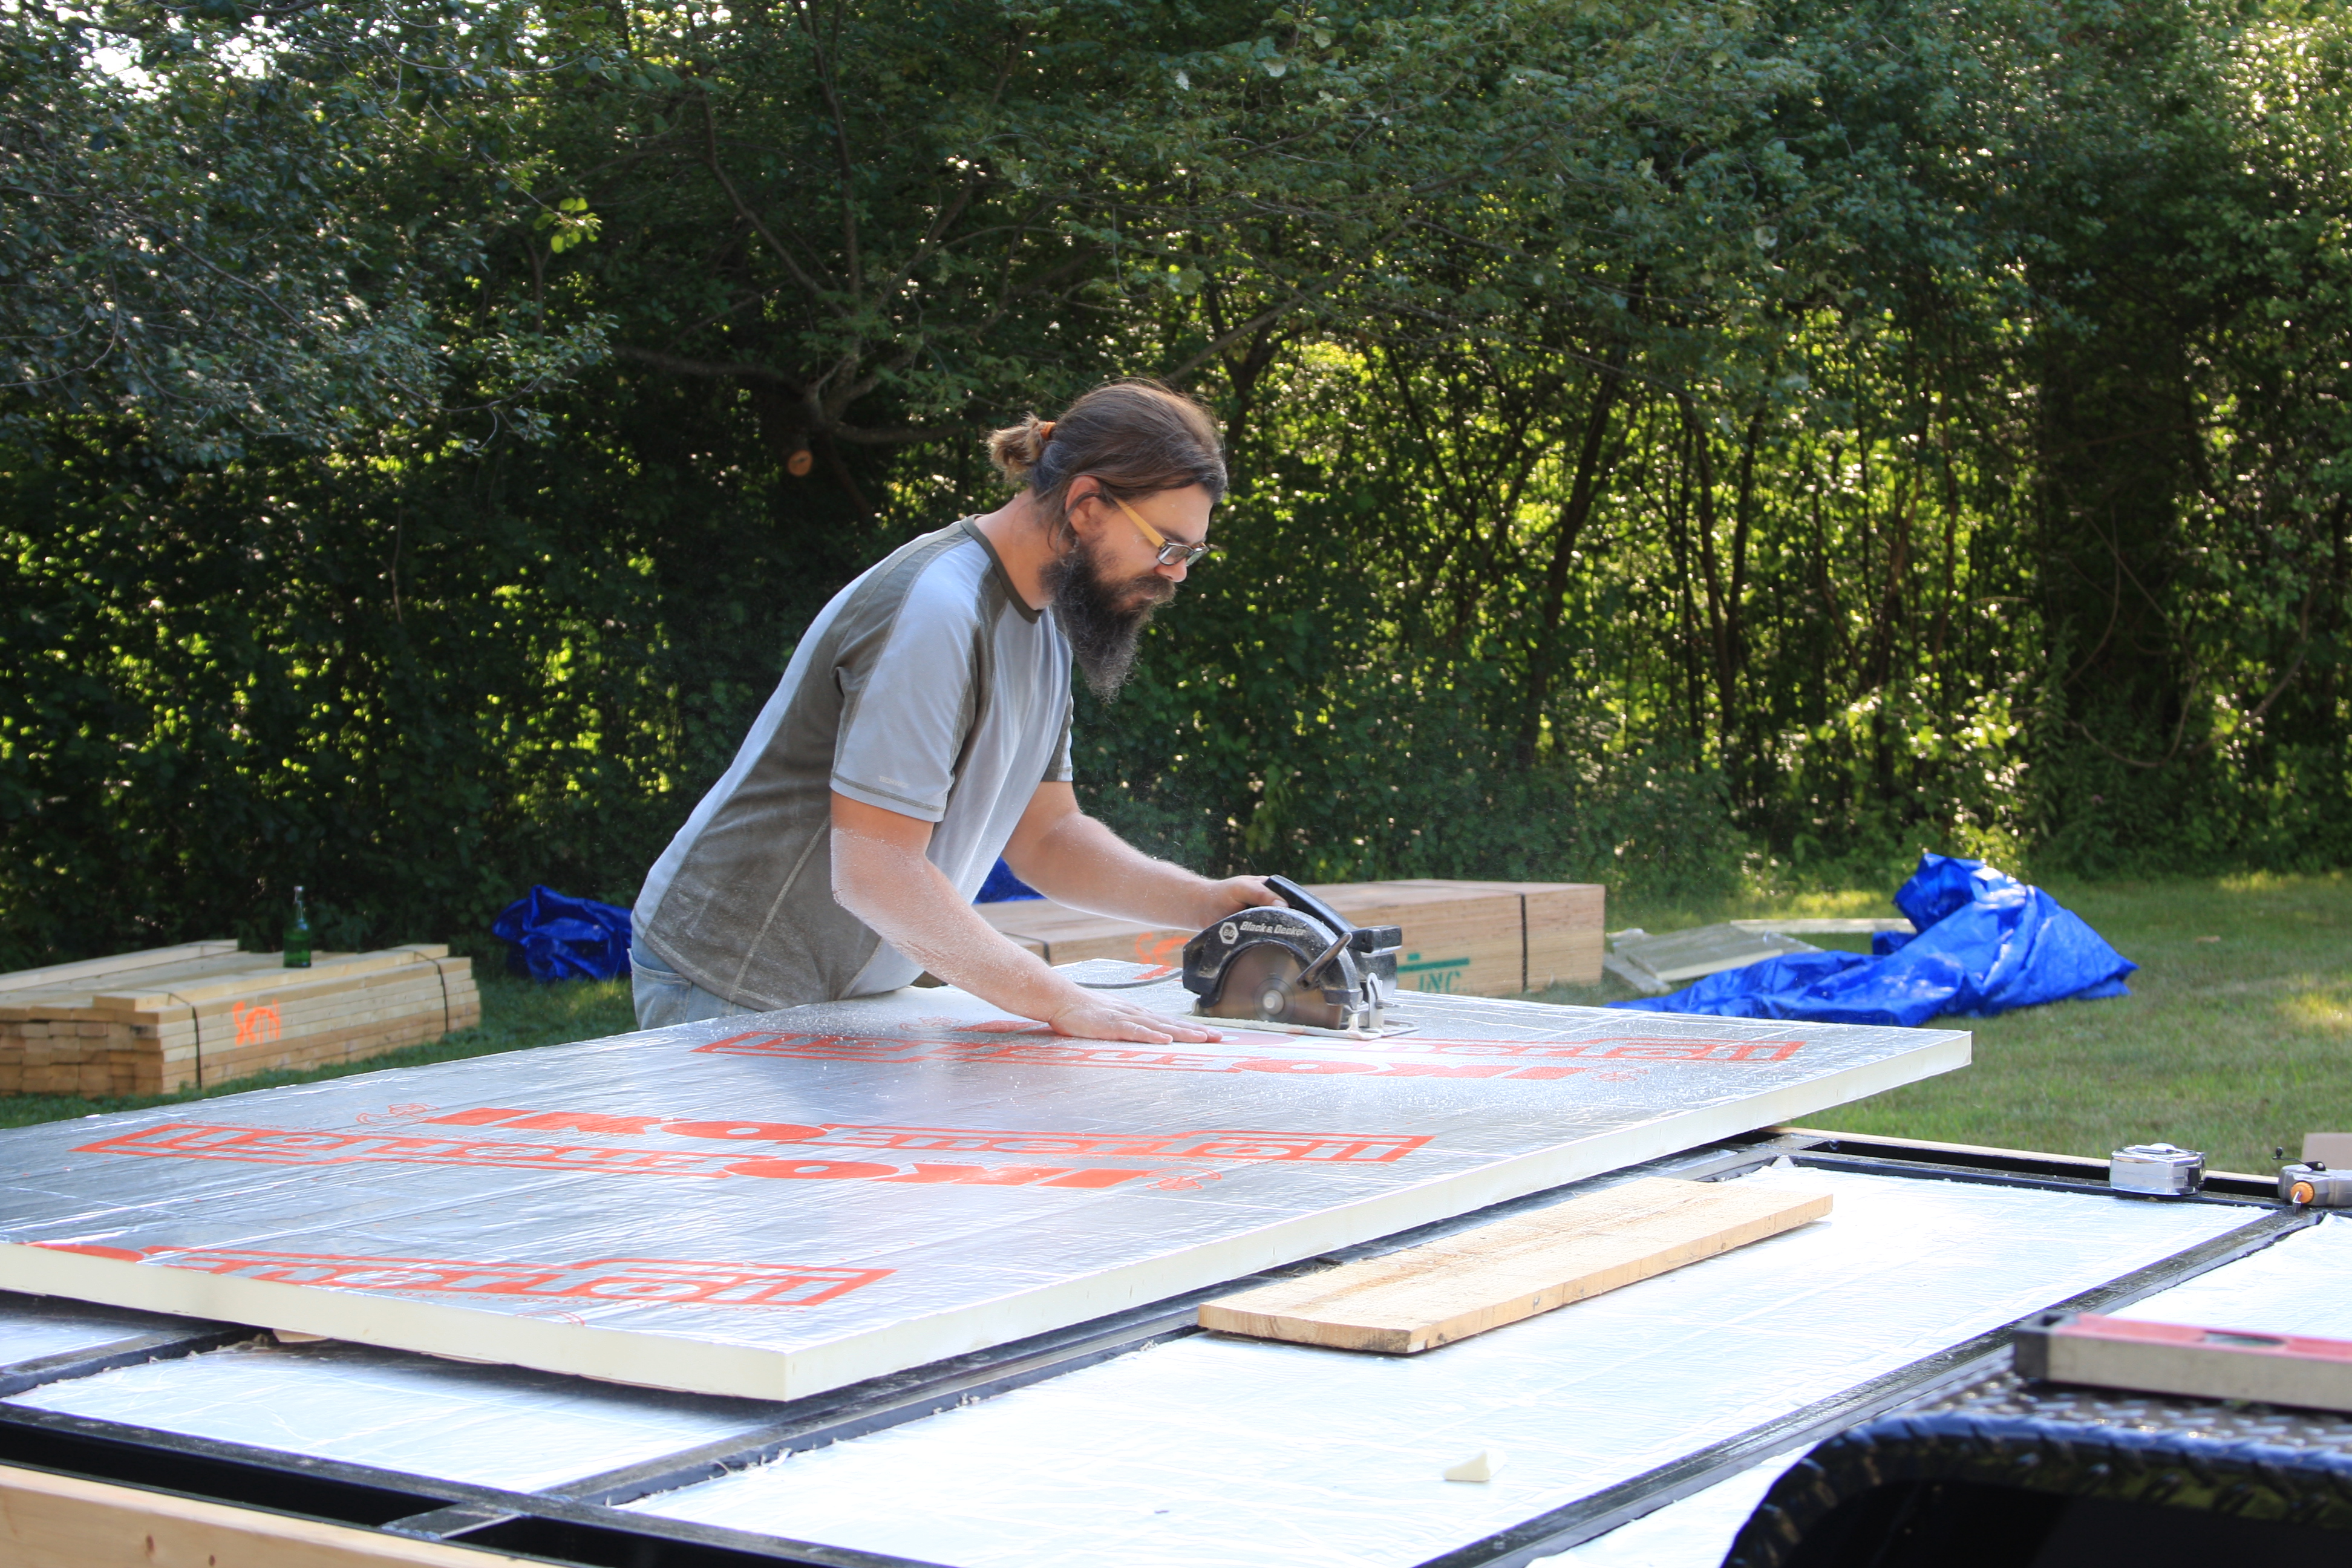
We were able to cut the polyiso insulation with a circular saw, but we cut the xps insulation with an exacto knife. This is one of life’s small favors. If you’re cutting xps insulation with a circular saw, please wear a mask. Xps is treated with fire retardants which are dangerous when inhaled. Polyiso isn’t treated with anything, although the dust still gets everywhere.

IMG_0894

Your beard is looking pretty white there, Seth.

IMG_0897IMG_0900

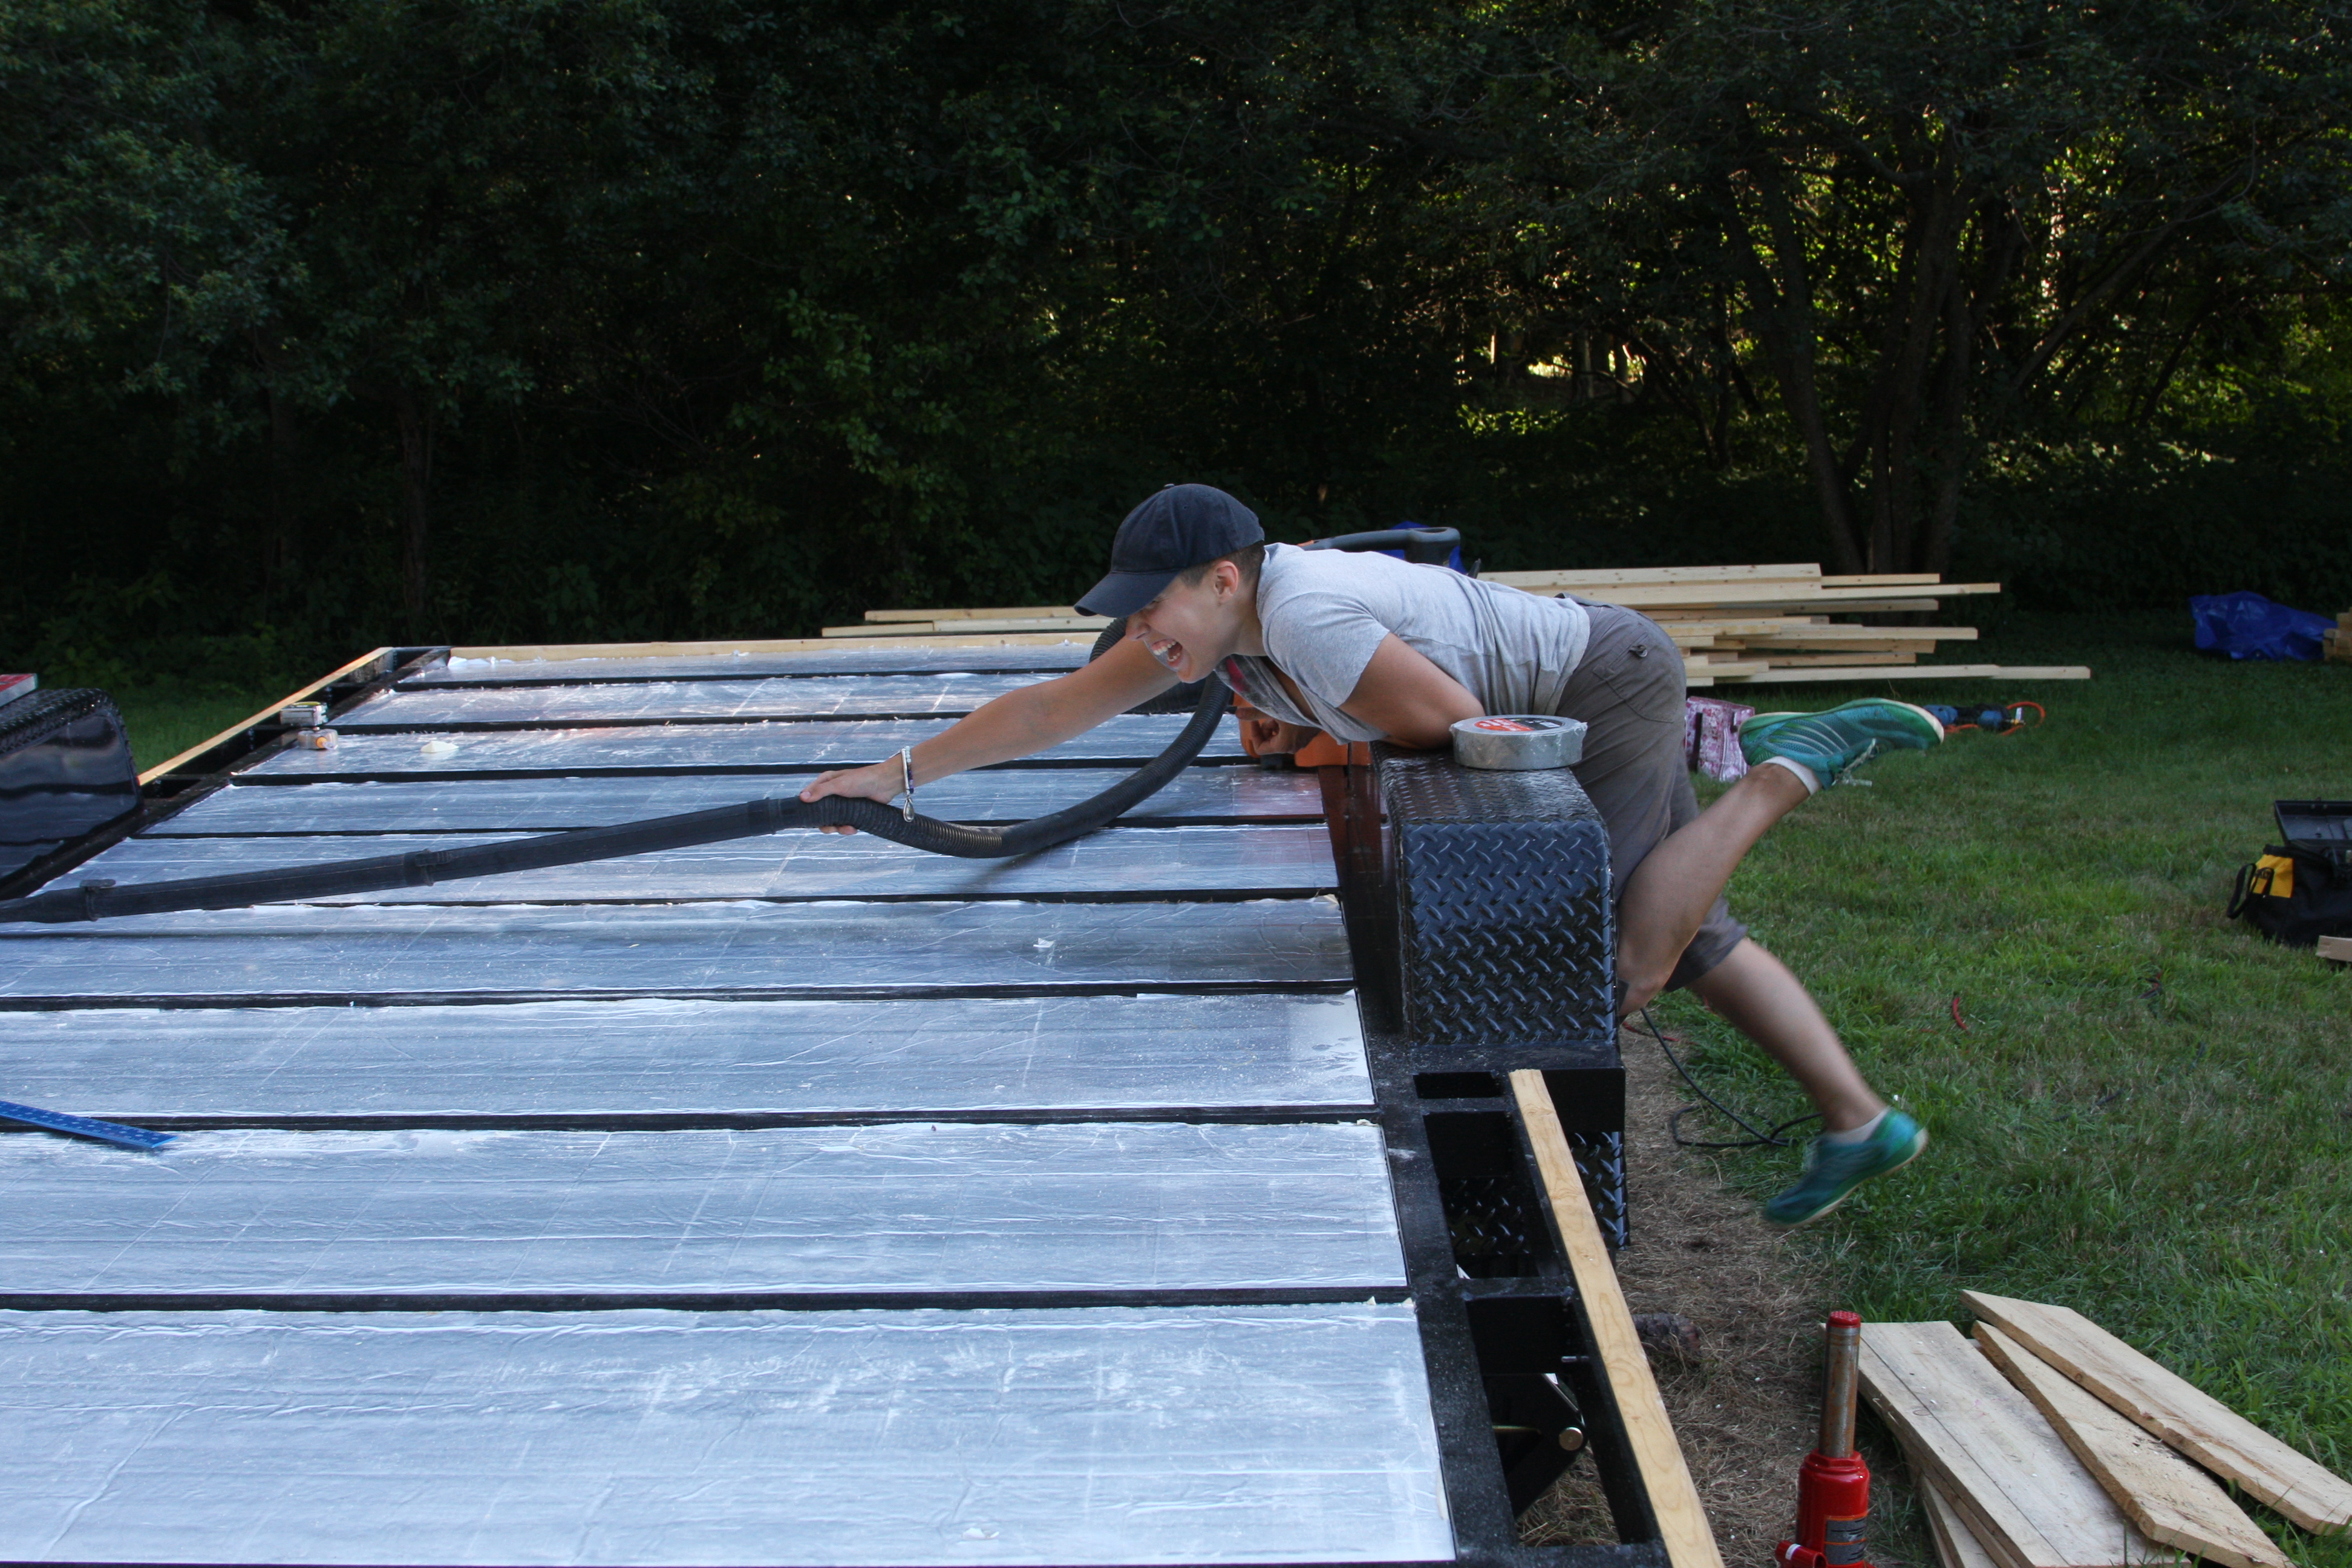
After cutting the insulation to size and fitting it into the bays between the trailer cross beams, we cleaned up so we could break out the plywood sub-floor.

Buying wood was another interesting process.  In the beginning, we had hoped to source our supplies from a local construction firm’s surplus, but the timing wasn’t right and that deal fell through. We ended up placing an order with one of the area lumber companies. But before we could buy anything, we had to do research. Research! Always research.

Plywood is made with by sandwiching glue between thin sheets of wood.  The glue used to make plywood is made with formaldehyde, which is one of those chemicals that off-gasses volatile organic compounds (VOCs) into the air.  In particular we’re talking about urea formaldehyde, which causes health problems in susceptible people. If you look up susceptible people in the dictionary, you are likely to find the picture of a certain tiny house builder named Christine.

You might have heard of formaldehyde VOCs being a problem in the last ten years or so since Hurricane Katrina hit.  The FEMA trailers the government distributed after Katrina were in the news for years because they were built with plywood made with urea formaldehyde, causing all sorts of health problems for the people who lived in them. This is something we decided to avoid, thanks very much, and so we searched for plywood made with urea formaldehyde-free glue. Although some companies had never heard of urea formaldehyde-free plywood, the problem wasn’t finding it so much as finding a lumber company that would sell us a small quantity of it. Over and over I heard that they could order me the plywood, but only if I bought a whole shipment at once.  They couldn’t sell it if they broke open the pallet to give me my few pieces.  It’s the difference between buying 50 sheets of plywood vs. 120.

It took a couple of weeks, but we found a company that was happy to sell us a small quantity of the plywood we want, and they delivered it to our site so that we can start right in on the subfloor.

Bonus proof that our life is a sitcom:

When the lumber company came to deliver our wood, they called to say they were 20 minutes away.  An hour later, they called back to say that they had gotten lost and dropped half our load of wood onto the street, but not to worry, they picked everything up and were on their way again.  And finally, when they unloaded the wood from the truck, they backed their forklift into our trailer and broke a taillight. Where’s the laugh track when you need it?

Leveling the trailer

Posted on August 16, 2015

Every tiny house trailer is unique. Even Tumbleweed trailers, though they’re “standardized,” have their own quirks trailer by trailer.  It’s just the way it goes when you custom fabricate large obects.  Each weld is different, each component of each axle, the way the lights are attached, they shape of the tongue.  If you’re thinking about purchasing a tiny house trailer, accept this now: Your trailer will not be perfect. New or old, you will have to account for something wonky.

This is something we didn’t recognize, so when we began leveling the trailer, we were frustrated, despite the fact that the steps to leveling a trailer are actually pretty simple.

  1. Purchase trailer leveling jacks.  We bought 6 of these jacks, and used them all. They are heavy duty, and their total capacity will more than handle our house under a full load. You may also need to purchase a lifting jack, like a bottle jack. We bought this one, although we didn’t use it in the end.
  2. Put some sort of chocks behind your wheels to prevent the trailer from shifting as you are lifting. We used logs.
  3. Position your leveling jacks under your trailer, about 2-3 feet towards the axles from each corner, lined up with a rail that runs from the front of your trailer to the back. It will help if you place your jacks on cement pavers or perhaps plywood, which will prevent your jacks from sinking into the ground as you are leveling.
  4. Raise your jacks so that they are just barely engaged with the trailer, and not lifting anything. You may also need to use the trailer hitch jack to get yourself close to level.
  5. Figure out how out of level you are. You can do this by checking your level across several points as you walk around the trailer.
  6. Raise whatever end needs to come up, or lower whatever end needs to go down. This may be tricky depending on how tall your wheels are and how sloped your ground is.
  7. Recheck your level. If your level bubble is between the two lines all the way around, you’re fine. Even if the bubble isn’t centered, you’re going to be fine. So long as the bubble is within the lines, call it good.

See? Easy. So why did it take us several hours?

IMG_0819For starters, our trailer has a quirk: it’s built with a slight arch to it called a camber.  This means that the axles are the lowest point of the trailer, and the corners arch very slightly up — in our case, by about a half inch.  We were able to level this out for the most part, except for one corner which is arched up higher than the rest.  Everything we did from that point on made the camber worse.

On top of that, we didn’t realize it was a camber until we took a string and stretched it from one end of the trailer to the other, straight down the length, and saw the gap under the middle of the string.  It was like a light blinked on.  Oh!  The trailer itself isn’t flat.

Thankfully, we have knowledgeable friends who were able to talk us down from our 95-degree day frustrated stupor.  The trailer is fine if it’s mostly level, they said. Putting the weight of the house on it will flatten out some of that arch, they said.  And you won’t be able to notice a 1/4 inch difference across a 24 foot span, they said, once the camber has flattened some.

In the end, we were able to get the trailer mostly level. When it comes time to raise the walls, we’ll build them so that they are perfectly level. The wood framing will allow the house to shift and sway as we’re traveling, and regain levelness when we’re parked. And we’ll have a house we can be proud of.

Pro Tips

  • Get jacks meant specifically for leveling a trailer, and not for lifting a car to change a tire
  • Purchase a drill bit that will enable you to raise and lower your scissor jacks quickly
  • Use a longer level — 6 feet long if you can get one, or better yet a laser level