One of the things that Seth has been saying all along is that trim makes the style of the house. He’s said it about both the inside and the outside. It’s a good thing he’s been so adamant because when it comes to details like that, I don’t really have an opinion. Isn’t that terrible? For me, aesthetics generally take a backseat to price, so I expected to wing it when it came time to do the trim. Seth, though, has had an idea in mind of building a house inspired by the Craftsman era of design: 1920s bungalows full of simple lines, natural light, and beautiful wood. We looked at pictures online for months. Truly one of the nicest rabbit holes we’ve followed in…
Way way back, almost a year ago now, we purchased cedar clapboards for the tiny house. Sheesh, was it really that long ago? Yes, Instagram tells me it was last February. We got the clapboards delivered with the intention of staining them over the course of the winter so that we could install them in the spring and summer. Time ran away from us, and it was a while before we got the siding up and running. As per usual, the research phase made up the bulk of the delay. We wanted to find an eco-friendly coating for the siding, one that would bring out the beauty of the wood, protect it from the elements, and be ok for the environment and for people with…
This slightly slouchy hat features a wave and banjo cable pattern reminiscent of American vaudeville theater in the early 1900s. Or as I like to think of it, Cosmo Brown’s beginnings from the movie Singin’ in the Rain. With big yarn, some cables to keep it interesting, and old-fashioned seed stitch, this hat knits up quickly and is perfect for bus, train, or TV knitting to keep your hands busy. This hat is knit in the round and comes in one size. Final hat dimensions are 20” around and 7.5” long after blocking. Gauge is 4 stitches to the inch. I knit this hat for myself, and I love the way it fits on my head. Knit at such a large gauge, it is just big enough to wear for short…
Last fall just after the house walls went up, I was trolling Craigslist for materials when a kind soul posted dark brown corrugated metal roofing for sale, never used. It came in 17′ long panels. We jumped on it and U-hauled seven panels away from his house along with a couple of donated 2×4’s for traveling, kindly given by the gentleman in question whose entire roof had to be replaced unexpectedly instead of covered. Hence selling the panels.
Metal roofing is popular for tiny houses because it’s durable, affordable, lighter than asphalt, and relatively easy to install. It goes well with the “cabin on wheels” look that characterize a lot of tiny houses. Standing seam is ideal as the fasteners are not exposed to the elements and will last longer, but corrugated is good too. Supposedly the fasteners start to go around 10 years. We’ll see.
Metal roofing was Seth’s first choice but not mine. Originally, I wanted shingles, but sometimes you can’t pass up the Craigslist gods when they offer you a good deal. Or as my Memere used to say, “You can’t go wrong!” And of course I love it now.
Buying new metal roofing a lot different from buying used metal roofing via Craigslist. For starters, you get all of the accessories with it when you purchase yours from a store. We had to source our trim pieces, ridge cap, foam closures, and adhesives separately. If you’re buying new-ish metal panels for your roof through Craigslist, you should know that there is a good chance yours are made by Union Corrugating, like ours are. We discovered this by accident, but it’s no trick — count the corrugations per panel and see if you can find a match to some of the popular brands available through big box stores.
Union Corrugating sells their panels to DIY-ers through Lowe’s, and we were able to confirm this by matching the color of the panels to the colors of the roofing supplies in the store. Then all we had to do was purchase trim, touch-up paint, the ridge cap, etc. If your panels are not easily identifiable like ours, apparently there are such things as universal ridge caps and trim. They may not provide an exact color match, but I’ve seen people who enjoy the two-toned roof, and I’ve seen people who paint their roof so that everything matches. If you’re building a tiny house, you’re no stranger to improvisation at this point. Right?
The corrugated roofing process is fairly easy to describe, although less easy to execute (unless you have scaffolding. Invest in scaffolding). There are many, many tutorials about how to install metal roofing so I won’t add one here. I’ll just jot down a few notes about what we did.
We used Grace HT Ice and Water Shield as our underlayment. HT means high temperature. I think it was a good investment. Synthetic roofing underlayment lasts a lot longer in UV rays than does 15 or 30 lb. felt, and it won’t glue itself to the back of the roofing panels.
We cut our panels with an angle grinder, de-burred them, and then touched up the ends with paint so that hopefully they won’t rust.
Butyl tape is weird. It’s like if Play-Dough and Silly Putty got together and had a baby. Special order this because most stores don’t carry it.
We followed along with Tiny Home Builder’s method of transitioning the ridge cap from the gable to the dormer. We purchased the videos, but you can sort of see the way to do it in this blog post by Choo Choo Tiny House.
So this thing happened this one time where we moved the tiny house and two of our beautiful walls went from plumb to out of plumb. One shifted by an inch over nine feet, the other by a half inch over the same. To the practiced eye, the house looked bow-legged. I consulted with one of my friends and coworkers, a resident building expert with more than 60 years in the business. “Oh no big deal,” he said, “Just drill a hole in the two walls, use a come-along and ratchet it in, put up your collar ties, and release the come-along. Make sure you tighten them a bit more than they need because they’ll snap back when you let’em go. The collar ties’ll…
There has been a division in our life lately. A natural division for us, I think. It started in March when we learned that we are expecting our first baby this December, and culminated at the end of last month when some very kind folks moved our tiny house to their property so we can finish building. The division is this: Seth is focusing on the outward, aka the house, the house, the house. It’s a big task! Especially if we’re going to finish it in time for this baby we’re brewing. And I’m focusing on the inwards, which (thankfully) means resting, researching house details, and daydreaming over things to sew. It’s one of the more ancient divisions: woman inside, man out. It feels very Laura Ingalls…
There have been times we thought we’d never move into the tiny house. A lot of times. I think Tara and Tyler write about it well in their post, Despair, which I read last year when they posted it but didn’t fully understand. It’s hard to understand what it is about building a house that makes you want to give up completely. I can now say it’s because so many little things constantly wear away at you and you feel like you’re never making progress. You just want to be in the house. You want to feel like it’s looking like a home, when it really looks like a pile of bones and the weather is conspiring against you along with your suppliers and your bank account your stupid jerk brain that can’t compute basic geometry all of a sudden. And meanwhile, twice a week everyone asks, “How’s the house coming along?”
We were just at the part where we were going to make progress: put in windows, start siding. Sounds great, soon to look great! When we learned that we had to move the tiny house a few months sooner than planned. And it felt like back to square one. In order to make the house safe to move, we had to firmly attach it to the trailer.
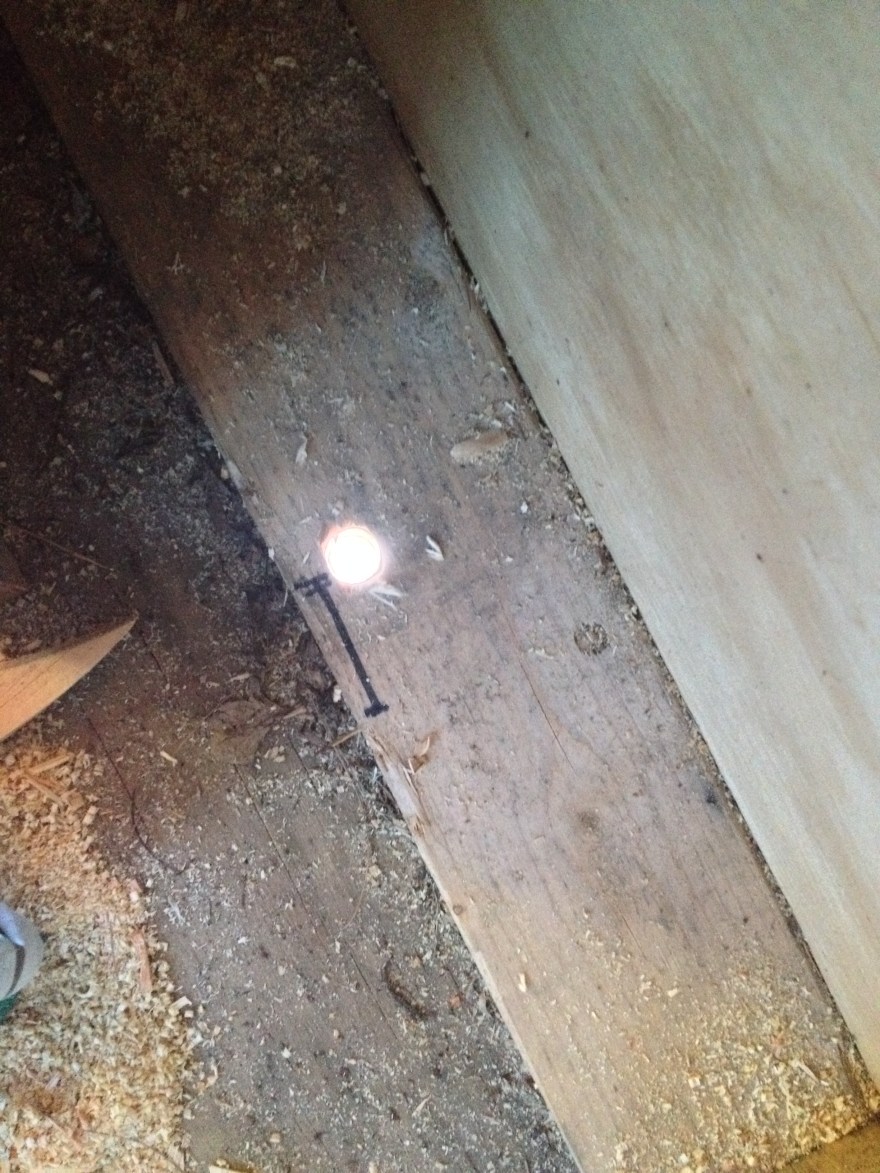
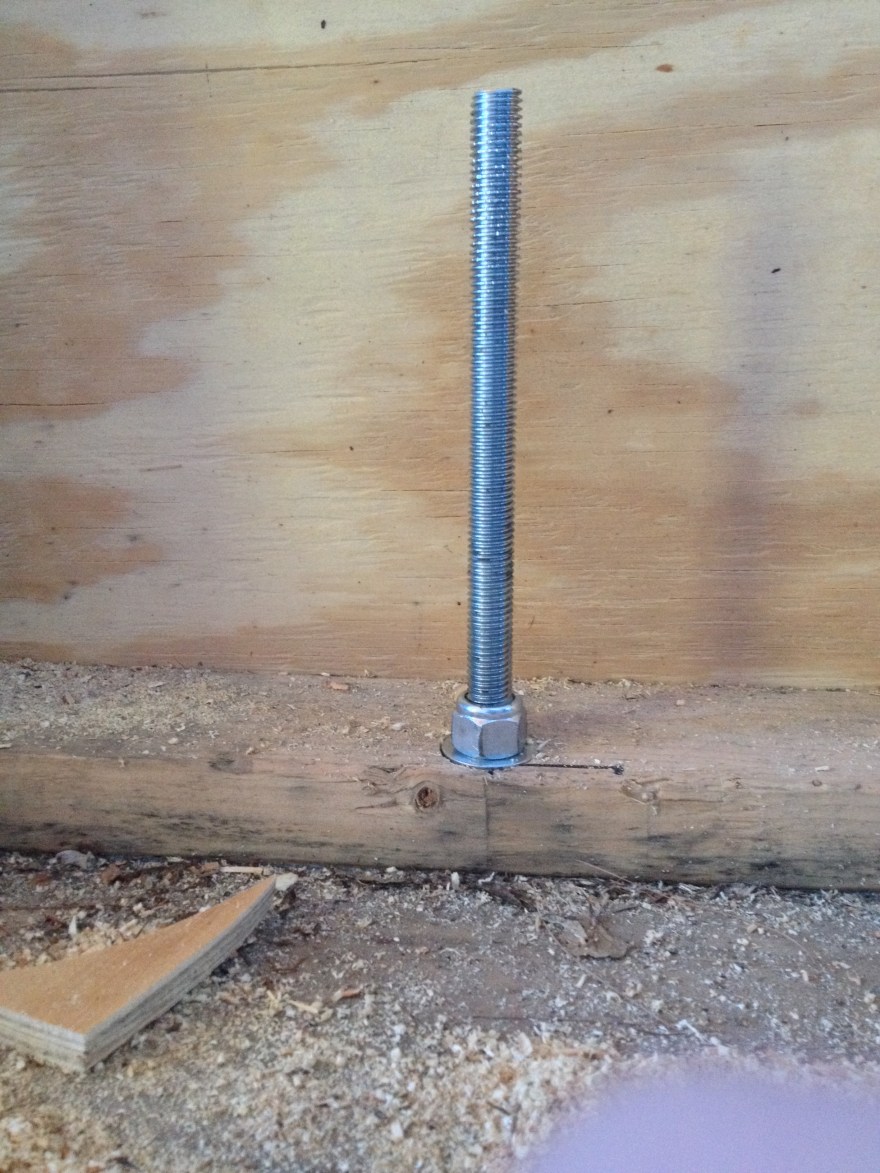
This is not a problem that all tiny-housers have. For example, Tumbleweed welds threaded rods onto their trailers, and as you build the walls you drill holes in the bottom plates and slide the rods through those. Tighten down with nuts and done. Other tiny house builders use strong ties like these, which connect to studs and use anchor bolts through the trailer. We had neither option, and so we went with threaded rods drilled through the trailer, up through the bottom plate, and then reaching all the way up to the top plate as well. We went with this approach because we needed to attach the walls to the pieces of metal channel that run perpendicular to the trailer’s length. The bottom plates have nothing to sit on otherwise. Might as well be secure, you know?
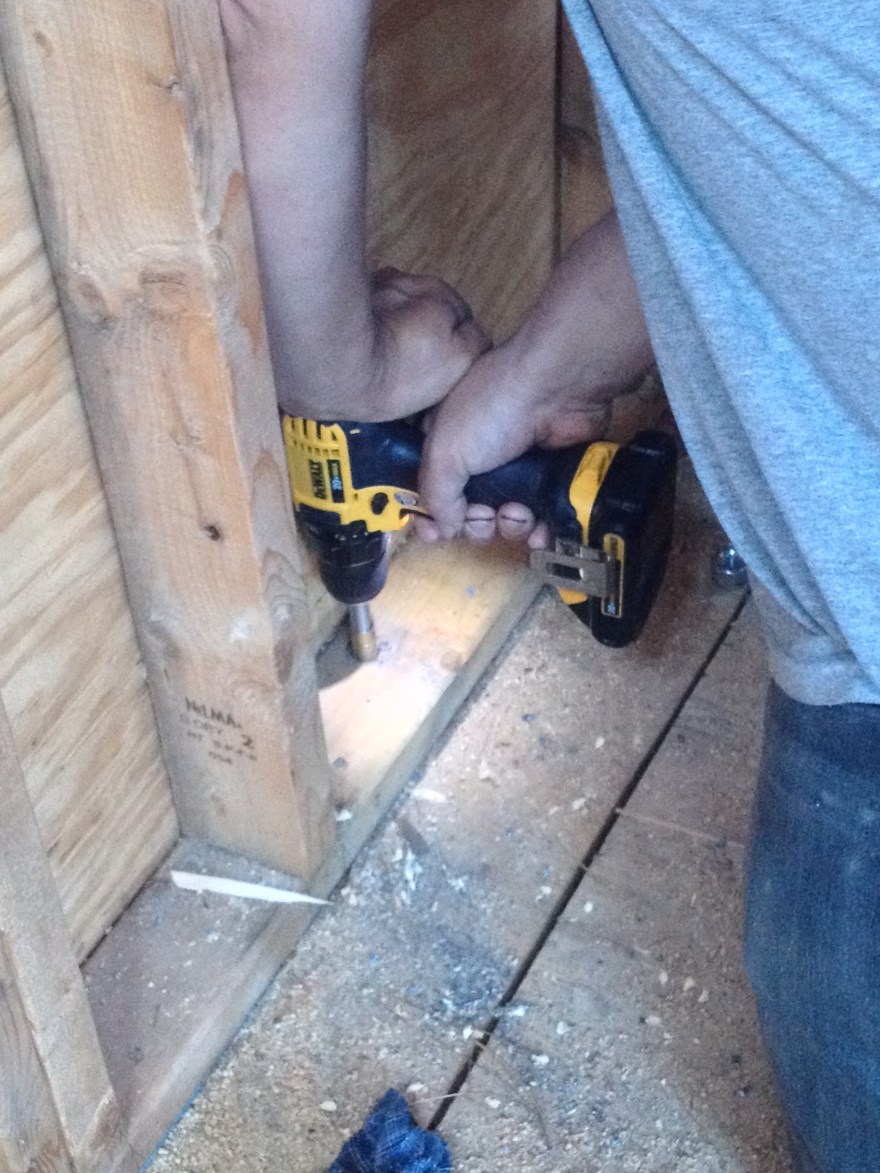
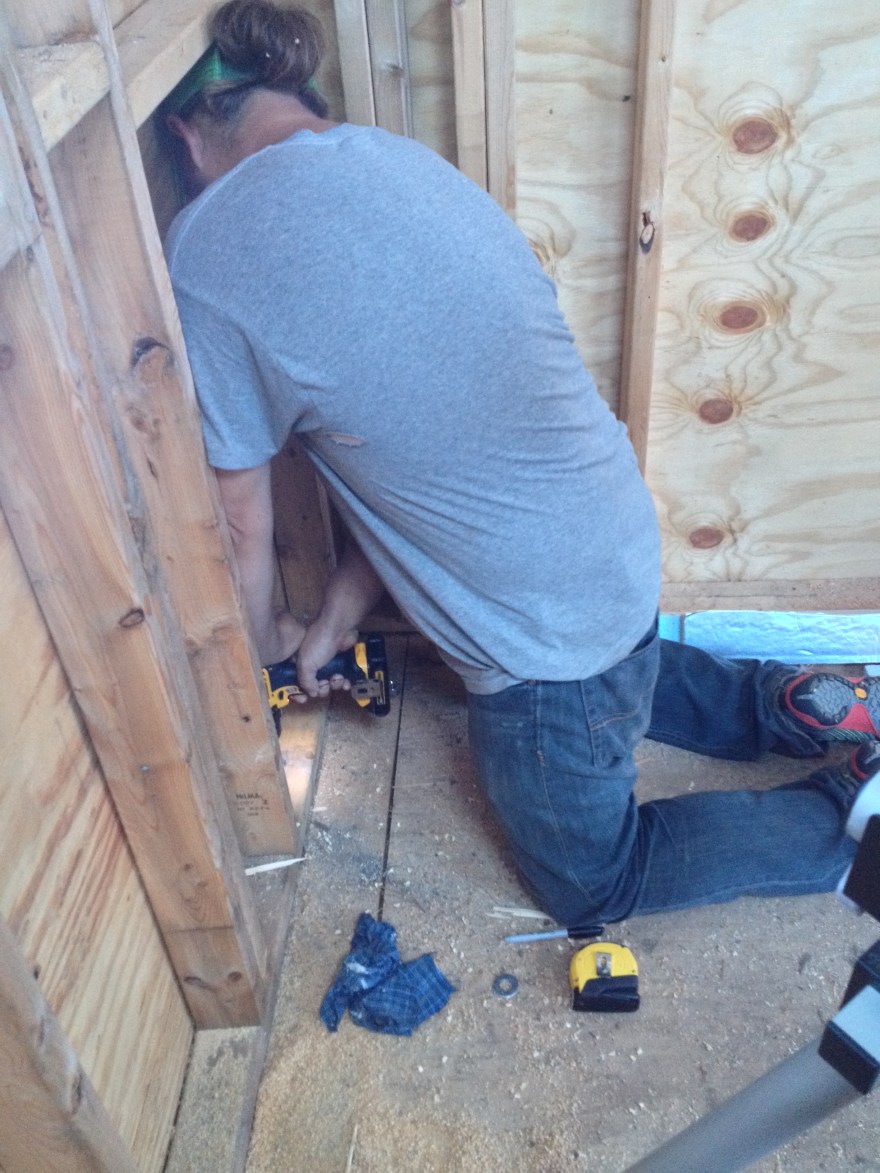
It was a process to figure out. We had to figure out how many attachments we needed, where they would sit that wouldn’t interfere with windows and yet still give us a rod every 6′ (as per building code), special order the rods, cut them to length, drill through the bottom plate, drill through the trailer, drill through the top plate, thread the rod through all the holes, and tighten down the bolts at both ends. Meanwhile, our suppliers conspired against us by providing the wrong size rods for two locations, along with our bank account which cringed at having to run to the hardware store four times for the correct tools to account for the change in sizes in our long lead time rods, and our stupid jerk brains that suddenly couldn’t do basic geometry. Yes we did cut that rod too long, and that other one too short. Building a tiny house is hard! Who knew, eh?
Eventually the rods were in. We tightened them down. We felt secure. We moved the house. And one of the walls shifted anyway. If there was ever a time I felt like giving up on the tiny house, threaded rods would be it.
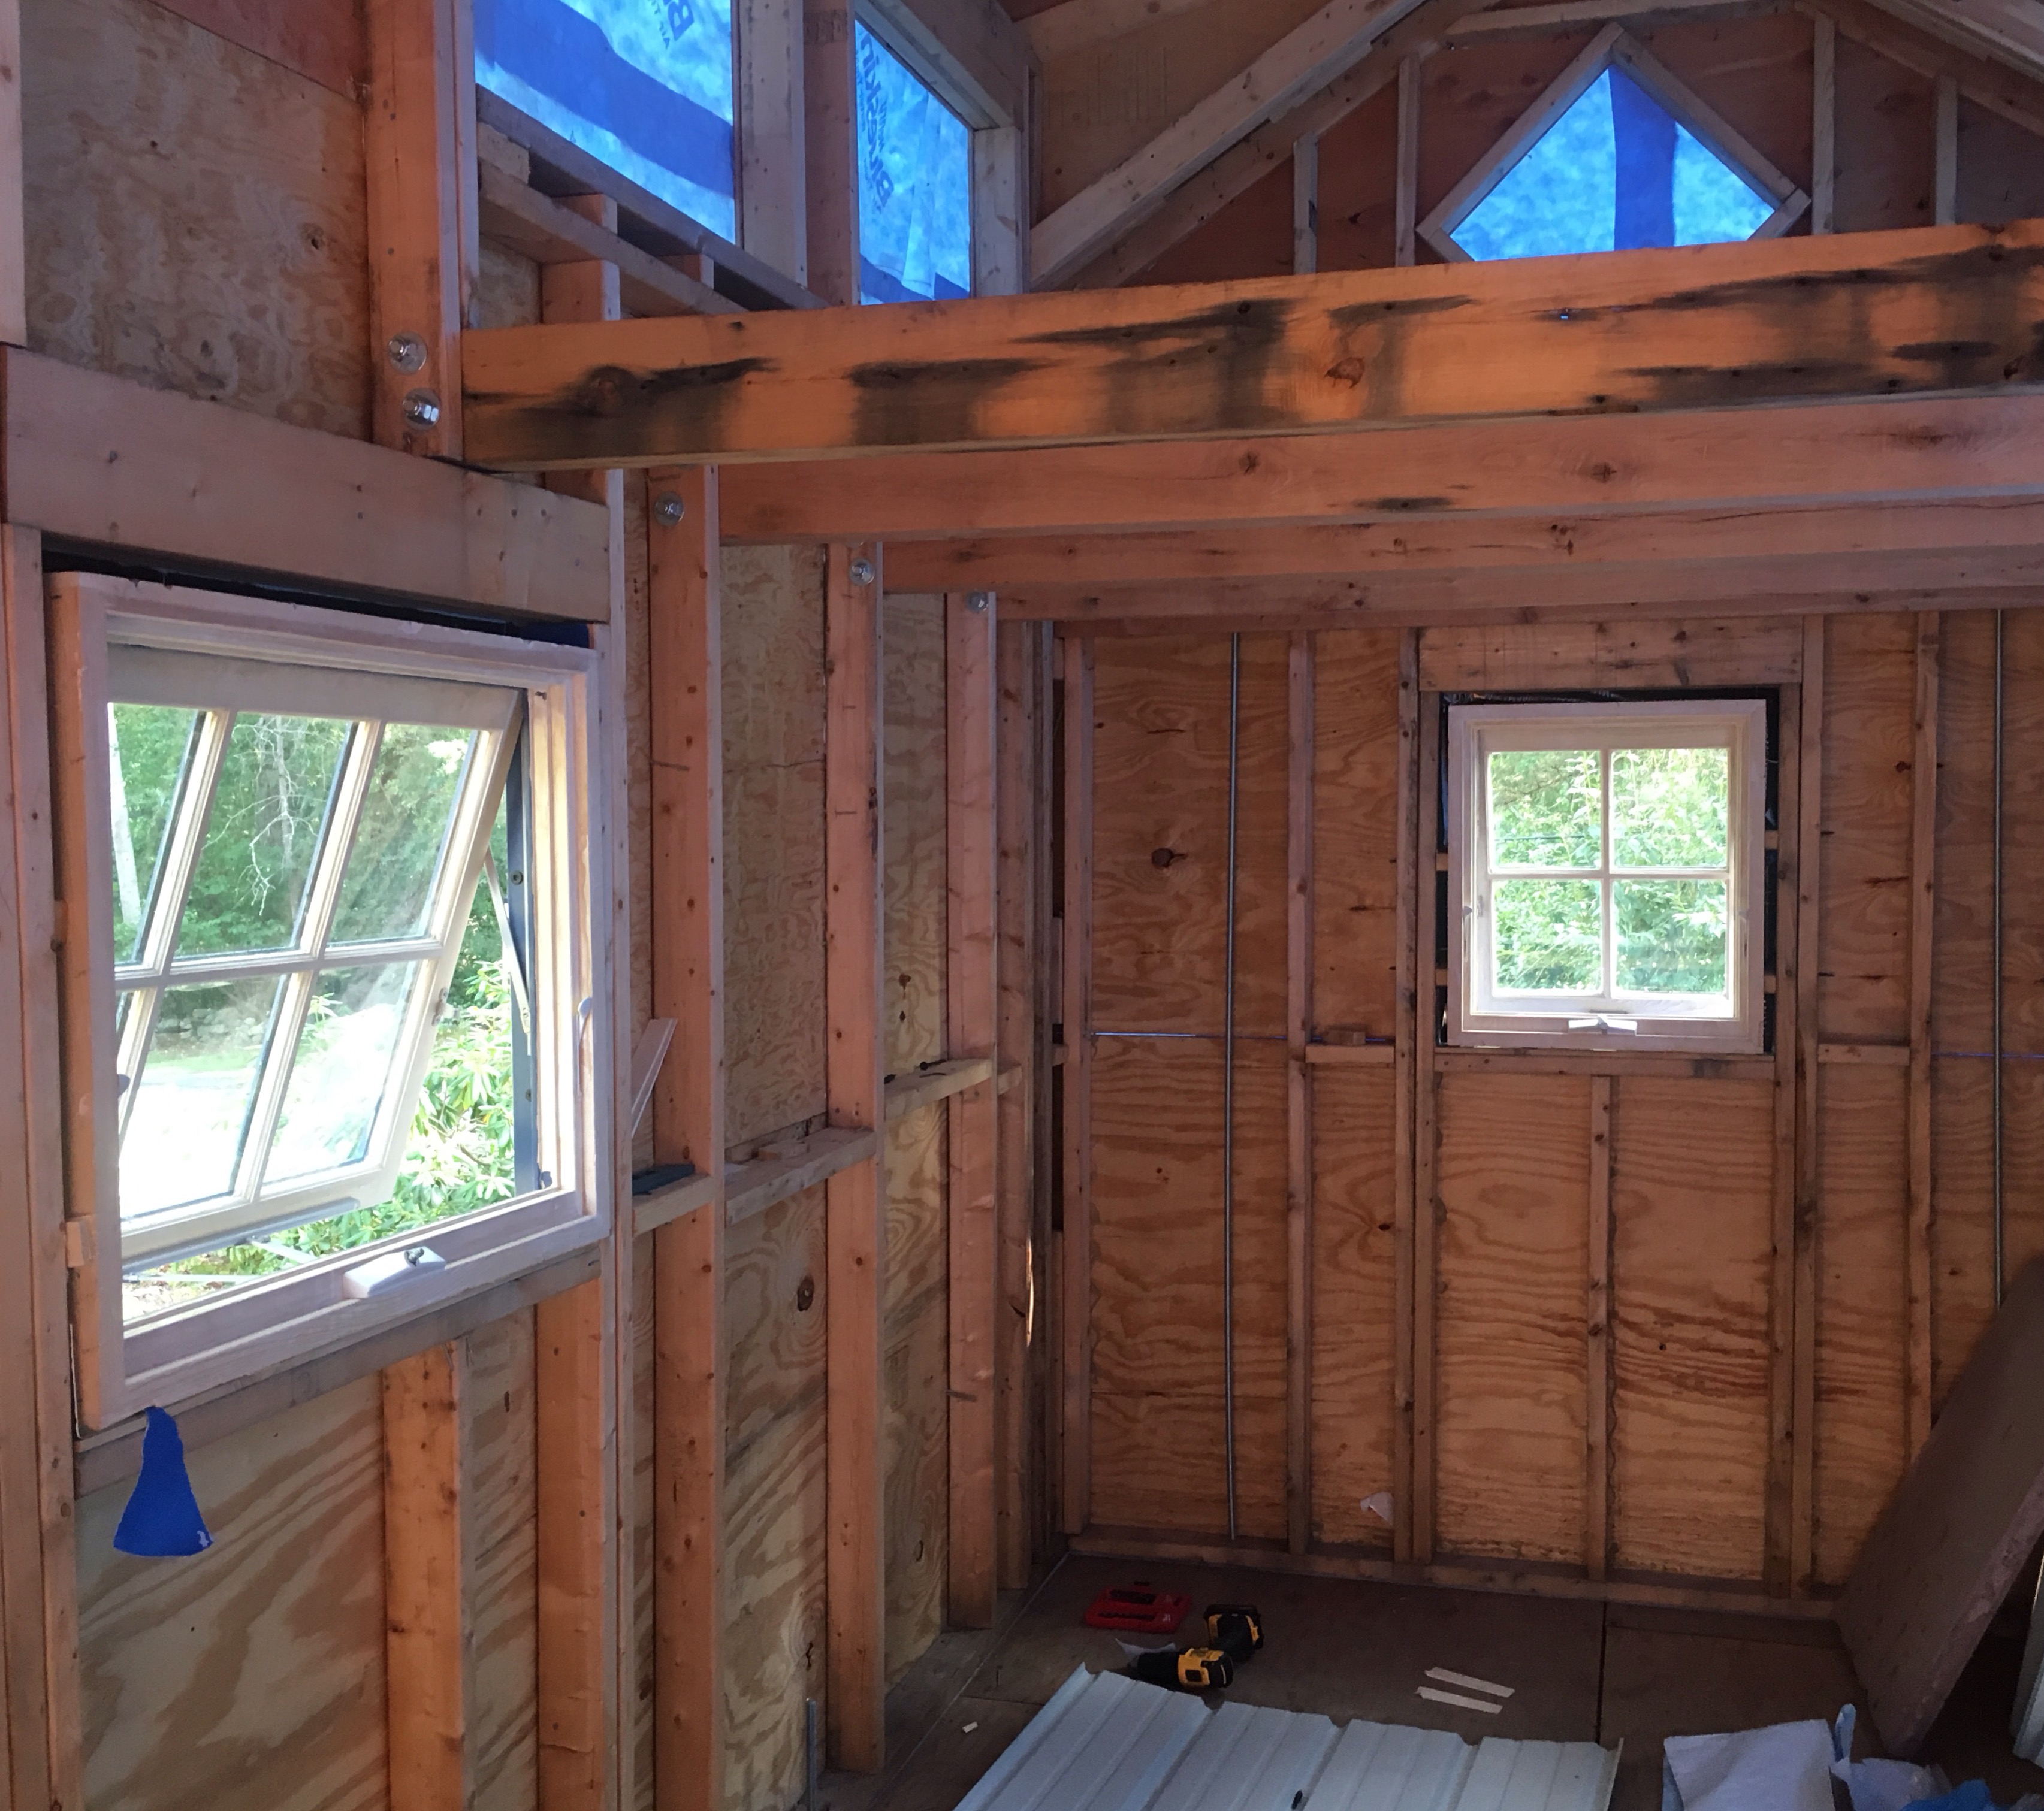
There are 9 windows in our tiny house, and only 2 of them are the same size. I think I said this sentence a dozen times over the 2 month stretch it took to get window quotes. It’s an important sentence. It tells window salespeople that my house is not a normal house. It also reminds me that we are not climbing Mt. Everest. Windows are kind of a big deal in terms of energy efficiency for the home. Windows are a weak point in walls. They have almost no insulation value, and so if you have a lot of windows in your house, chances are good that you’ll have cold spots in your house. You can more or less mitigate this by purchasing double-paned windows (at…
When it comes down to it, we’ve probably spent the most tiny house research time on building envelope systems. The building envelope is what protects the inhabitants of the house from wind and weather, and it’s made up of siding, air barrier, sheathing, and insulation. And if you ever talk to any architect about this, they’ll tell you that building envelope science is a murky world of half-truths and maybes. Folks, this ain’t easy.
Using information from articles like the ones here, here, here, here, and here, we determined that we want a vapor-permeable air barrier to wrap around our house. This will keep drafts and water out, but will allow water vapor to diffuse in and out of the house. We decided against a vapor barrier on the inside of our walls thanks in part to the sheep’s wool insulation we plan to use. We came up with these decisions because we’re concerned about water condensation and mold buildup in our tiny house, which are issues for tiny houses in general, but also for Christine in particular. We’re happy to talk about this in more depth! But frankly, building envelope science doesn’t interest most people, so if you want to know more please ask in the comments.
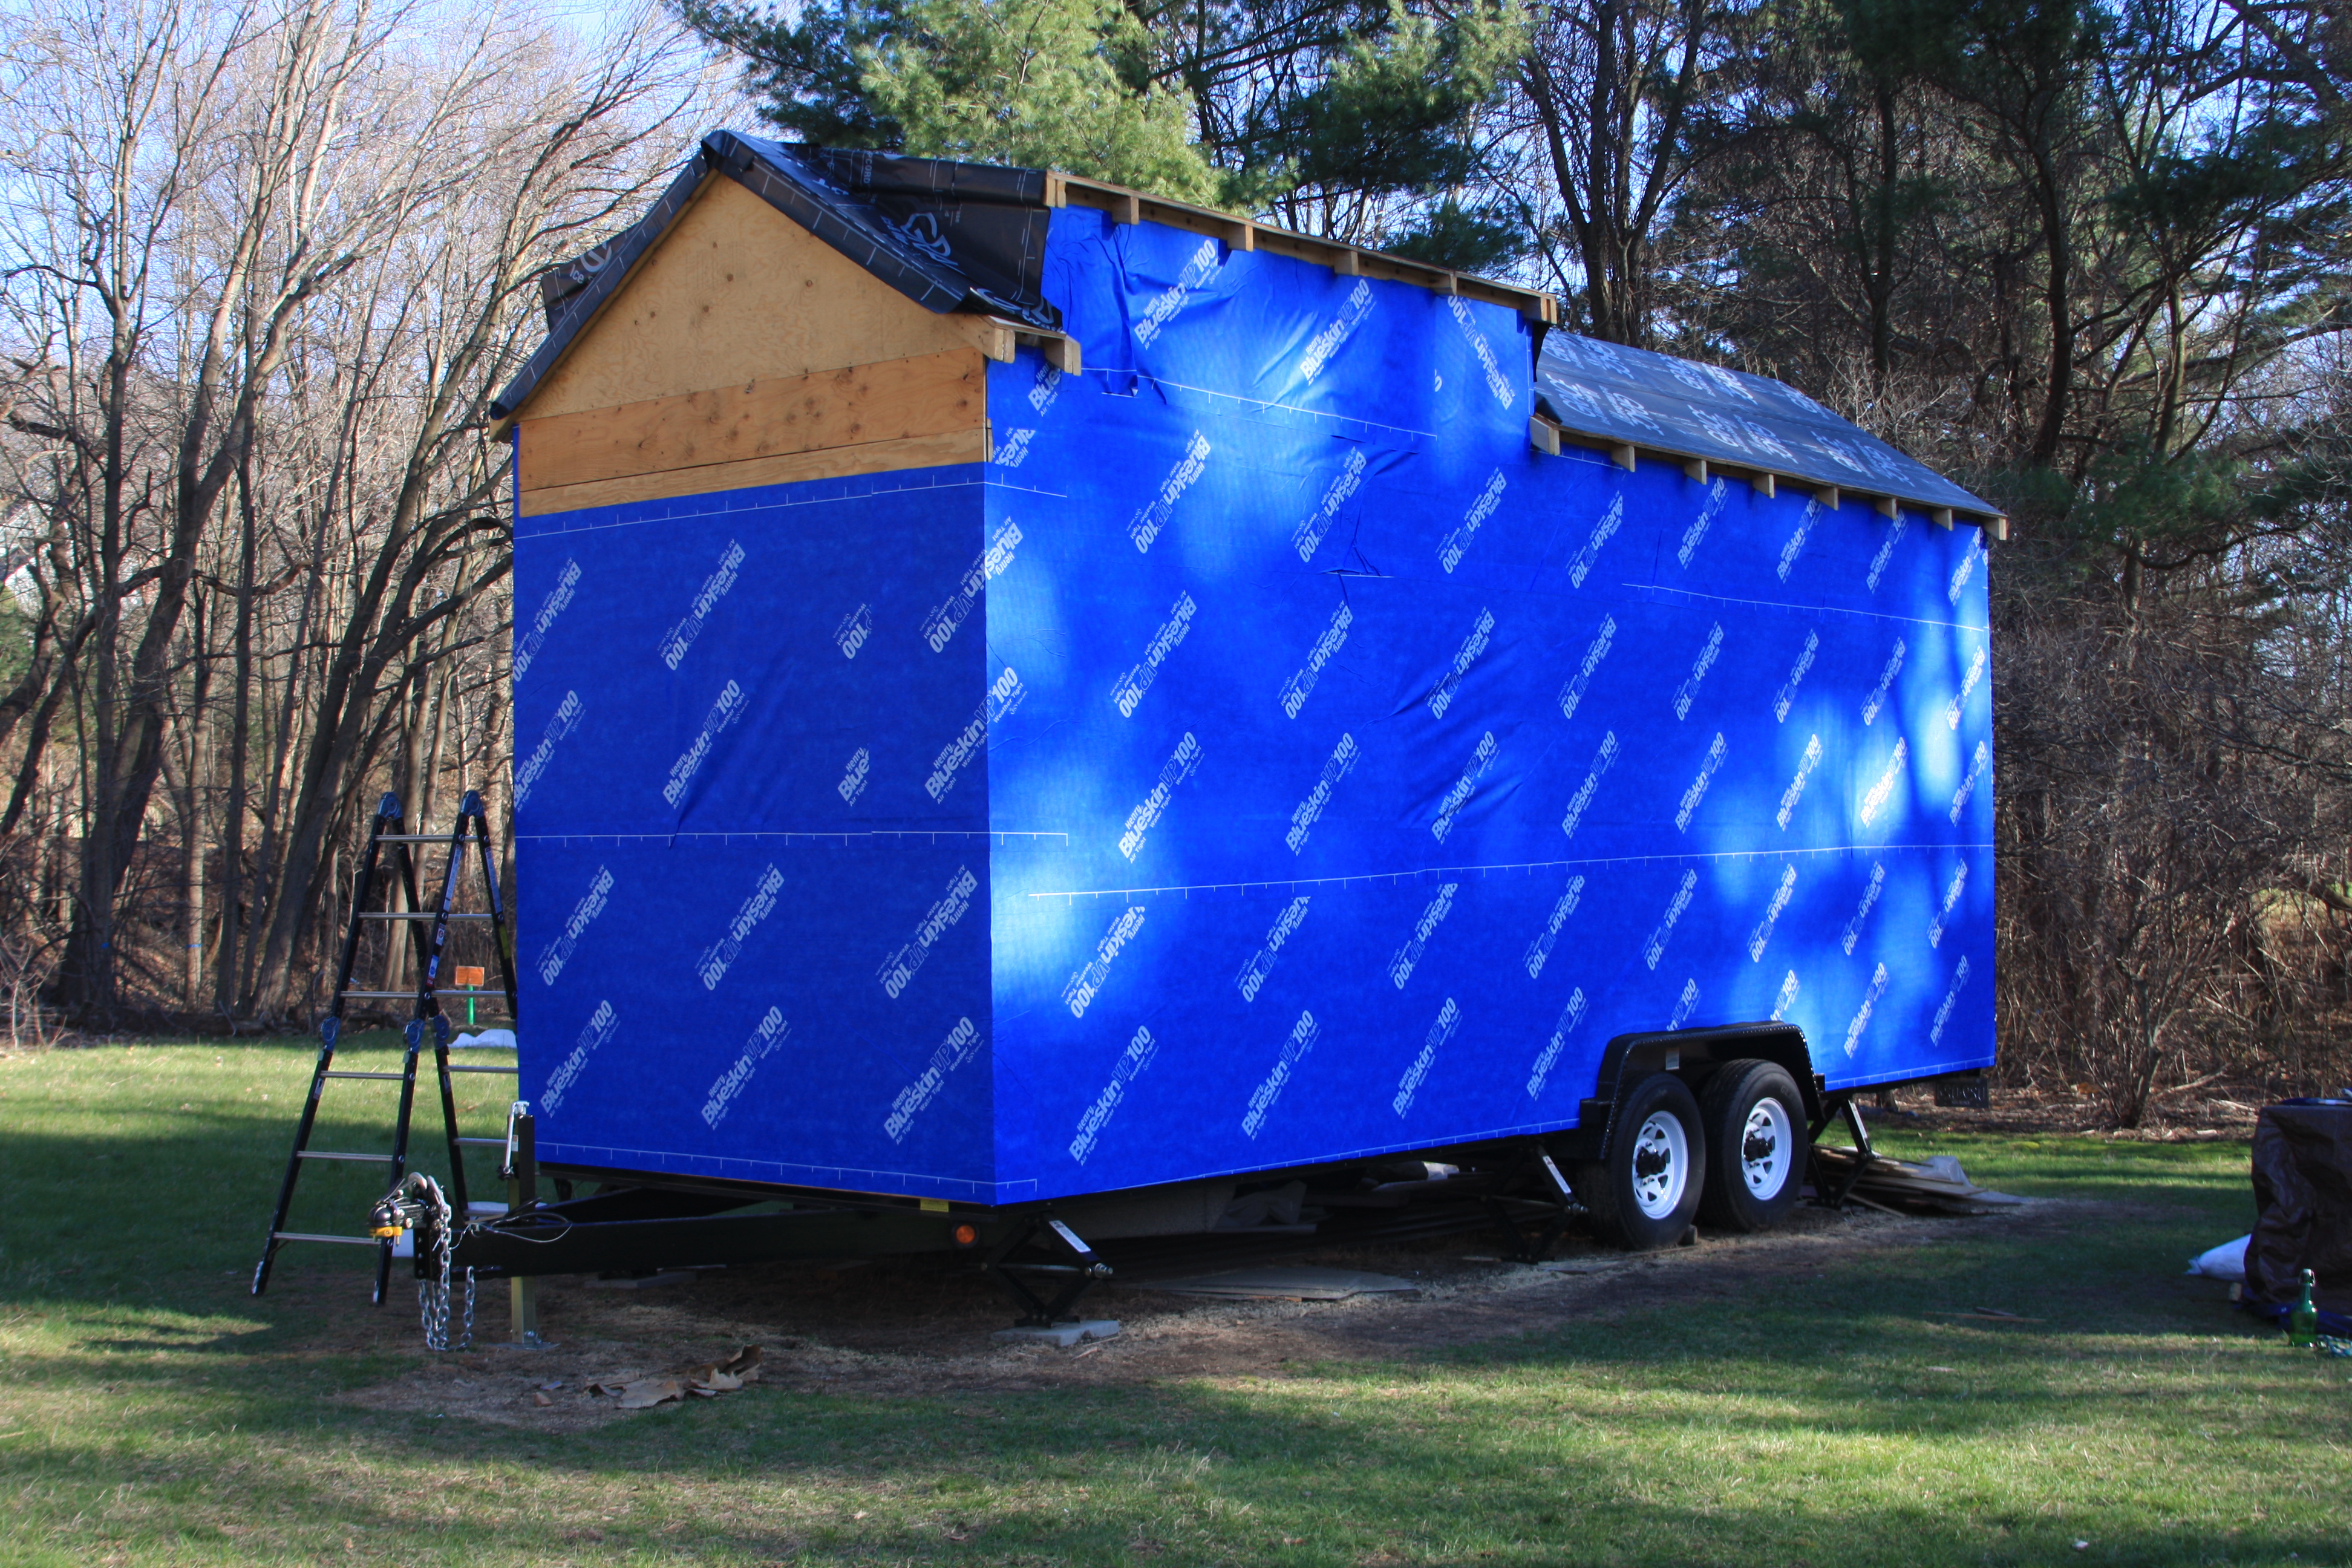
We decided to use the product Henry Blueskin VP100, which is a residential grade vapor-permeable air barrier that is locally available. It’s self-adhesive, like a giant sheet of sticker, and it seals itself at the seams.
For our first step, we routed out each window opening, and then spent the better portion of two weekends sticking the Blueskin to the outside wall sheathing.
This slideshow requires JavaScript.
The difference it made to the inside of the house was noticeable immediately. Stepping into the house at mid-morning this past weekend, we realized the house felt stuffy. And this with a gaping hole where the door goes! No more airflow through the cracks between our sheathing. I’d call that a success.
One area of the house where we paid particular attention was at the wheel wells. We left a 1/4″ to 1/2″ gap between the plywood and wheel wells of our house. This is so water can’t condense on the metal wheel wells and then be absorbed into the plywood, making for a weak point in the walls where mold can occur. However, we also wanted to make sure water couldn’t migrate into the house through this gap and soak our insulation.
This is another problem particular to tiny houses. Tumbleweed doesn’t address this with their trailers (although they might in their house plans, I’ve never checked), but there is a trailer company that has an optional welded flange all around their wheel well. You’re supposed to build your walls so that the plywood sits just on the outside of the flange, which prevents water from creeping in to your house. It’s a pretty cool solution, but it’s one that we didn’t have, and I’d still be concerned about water condensation where the metal touches the plywood.
We opted to use EPDM rubber roofing flashing tape at our wheel wells. It feels like a long rubber sticker, and we stuck it to the wheel well and then up onto the walls. Our housewrap came down over the EPDM. We’re not sure how it will hold up long term, but it seemed like a good option, and it provides a thermal break between the metal wheel well and the wood walls. We’ll see how it goes.
This slideshow requires JavaScript.
You can see that it pulled away a little bit from the corners after a week or so on the trailer, so we did have to cut and patch it once already. But overall, we’re pleased with how it came out. We’ve got high hopes!
Next up is roofing, and after that will be windows, the door, and siding. And then we can start work on the inside. Is that supposed to be the easy part?
Since the local newspaper published an article about our tiny house last month, we’ve had a lot of traffic headed our way. Mostly, this has been great! We love chatting about the tiny house with new people and having people recognize Seth in random places. But the added attention did come with a snag. The local building department investigated our house and issued us a stop work order in the week after the article, which meant we couldn’t do any work. Unfortunately, this happened during one of the warmest Februarys I can remember, putting a halt on all things tiny. The building department gave us the stop work order because, like in most municipalities, the tiny house falls into a gray area in zoning…


